I threw this together last night, just making it up as I went, and it turned out really good. You may have to adjust the seasonings because one challenge I have when cooking is that I don't measure, so the seasoning measurements are guesstimates. It's always better to start out small and add as needed. You can always add more, but you can't take it out once it's in. So here you go and I hope you like it.
Bren's Chicken Rice Stew
Copyright 2011 Brendilly Bakes, All rights reserved
2T. Unsalted Butter
2T. Extra Virgin Olive Oil
6 Skinless Boneless Chicken Thighs
10-12 Baby carrots, sliced
1/2 Med. Green Pepper, diced
1/2 Vidalia onion, diced
4 Cloves Garlic, minced
1/2C. Pinot Grigio or dry white wine
3C. Low Sodium Chicken Broth
1C. Brown Basmati Rice
1C. Frozen Peas
1C. Frozen Corn
1 Can White Navy Beans
Salt and pepper to taste
1/2t. Celery Salt
1/2t. Poultry seasoning
1t. Fennel Seed
Over medium-high heat in a large dutch oven, brown chicken in butter and olive oil making sure the oil is hot before adding the chicken. Once browned, remove the chicken from the pot to a plate and set aside. Saute onion, carrots, and green pepper in the same dutch oven until soft. While veggis are cooking, chop chicken. Add garlic to vegetables and saute another minute or two. Add the wine and deglaze pan, then simmer uncovered for 5 mins. Add chicken stock, peas, corn, and seasonings and stir. Add rice, and the chicken back into the pot. Bring to a boil, reduce heat, cover, and simmer 30-45 mins. until the rice is tender. Add beans, adjust seasonings, and simmer 10-15 mins. more to warm beans. Serve in bowls with crusty bread and enjoy!
Thursday, May 19, 2011


Monday, May 16, 2011
Basmati Rice with Peas
1 1/2 T. Butter
1 T. Olive Oil
1/2 of a Vidalia onion, diced
1C. Brown Basmati Rice
2C. Chicken Broth
1/2 Cup Pinot Grigio
Salt and pepper to taste
1/3C. Frozen Peas
Over medium heat, saute onion in butter and olive oil until onions are translucent. Add Rice and stir to coat in butter, saute until rice is toasted brown. Add broth and wine and bring to a boil. Reduce heat, cover and let simmer 20-30 mins. until liquid is absorbed and rice is tender - adding more liquid if necessary. Once rice is tender, stir in peas, turn off heat, cover and let sit for 5 mins. Finish with salt and pepper to taste.
1 T. Olive Oil
1/2 of a Vidalia onion, diced
1C. Brown Basmati Rice
2C. Chicken Broth
1/2 Cup Pinot Grigio
Salt and pepper to taste
1/3C. Frozen Peas
Over medium heat, saute onion in butter and olive oil until onions are translucent. Add Rice and stir to coat in butter, saute until rice is toasted brown. Add broth and wine and bring to a boil. Reduce heat, cover and let simmer 20-30 mins. until liquid is absorbed and rice is tender - adding more liquid if necessary. Once rice is tender, stir in peas, turn off heat, cover and let sit for 5 mins. Finish with salt and pepper to taste.
Thursday, May 5, 2011
P.B.&J. Grilled Cheese
The other day at lunch, my granddaughter and I decided to have a little fun with our grilled cheese. Most days she'll choose either P.B.&J. for lunch or grilled cheese. This day we decided to have both....at the same time......together. It was awesome! Papa even tried it and loved it. Here's what we did:
* Butter two slices of bread
* Turn one buttered slice over and spread with Peanut Butter, drop it in a skillet over medium-high heat, buttered side down.
* Place a slice or two of cheese on top of the peanut butter bread in the skillet (we used Colby-Jack).
* Turn the other buttered slice of bread over and spread with your favorite jelly, place jelly-side down on top of the other bread in the skillet like a grilled cheese.
* Grill until golden brown and cheese is melty.
* Enjoy! :-)
* Butter two slices of bread
* Turn one buttered slice over and spread with Peanut Butter, drop it in a skillet over medium-high heat, buttered side down.
* Place a slice or two of cheese on top of the peanut butter bread in the skillet (we used Colby-Jack).
* Turn the other buttered slice of bread over and spread with your favorite jelly, place jelly-side down on top of the other bread in the skillet like a grilled cheese.
* Grill until golden brown and cheese is melty.
* Enjoy! :-)
We're Back!
Good Morning my friends!
You may or may not have noticed that I've not been blogging much the past month or so. I took some time off to deal with some health issues. They are still not completely resolved, and I'm tired of being in limbo. I miss my foodie friends and the fun of blogging, so I'm back for as long as my hands can pound on the keyboard in any way. I have some fun things to share with you, but first I must get my workout in, so off to my stationary bike I go and I will be back.....again. :-) Have an AWESOME morning!
You may or may not have noticed that I've not been blogging much the past month or so. I took some time off to deal with some health issues. They are still not completely resolved, and I'm tired of being in limbo. I miss my foodie friends and the fun of blogging, so I'm back for as long as my hands can pound on the keyboard in any way. I have some fun things to share with you, but first I must get my workout in, so off to my stationary bike I go and I will be back.....again. :-) Have an AWESOME morning!
Friday, April 1, 2011
Chocolate Cupcakes w/Strawberry Buttercream Frosting

Ok. This recipe was originally the Mocha Cupcakes, but I've tweaked it pretty much beyond recognition so I renamed it. I played with some unusual ingredients with very favorable results. Everybody loved these. Give them a try and see what you think. I'd love to hear your feedback.
Chocolate Cupcakes w/Strawberry Buttercream Frosting
1 1/3 c. White whole wheat flour
1/3 c. Unsweetened cocoa powder
1 teaspoon baking powder
½ teaspoon baking soda
¼ teaspoon salt
1 teaspoon ground cinnamon
½ cup chocolate almond milk
½ cup vanilla yogurt
1 teaspoon vanilla extract
½ cup (1 stick) unsalted butter, at room temperature
½ cup granulated sugar
½ cup light brown sugar
1 egg, at room temperature
1. Preheat the oven to 350 degrees F. Line a standard-size muffin tin with paper liners.
2. Whisk together the flour, cocoa powder, baking powder, baking soda, cinnamon and salt.
3. Beat the butter and both sugars together on medium-high speed until light and fluffy, about 2-3 minutes. Add the egg and beat until combined. In a measuring cup, combine the milk, yogurt, and vanilla. Slowly add the flour mixture, alternating with the milk mixture, ending with the flour mixture.
5. Divide the batter evenly between the 12 liners. Baking for 17-20 minutes or until a toothpick inserted in the center of a cupcake comes out clean. Cool completely before frosting cupcakes.
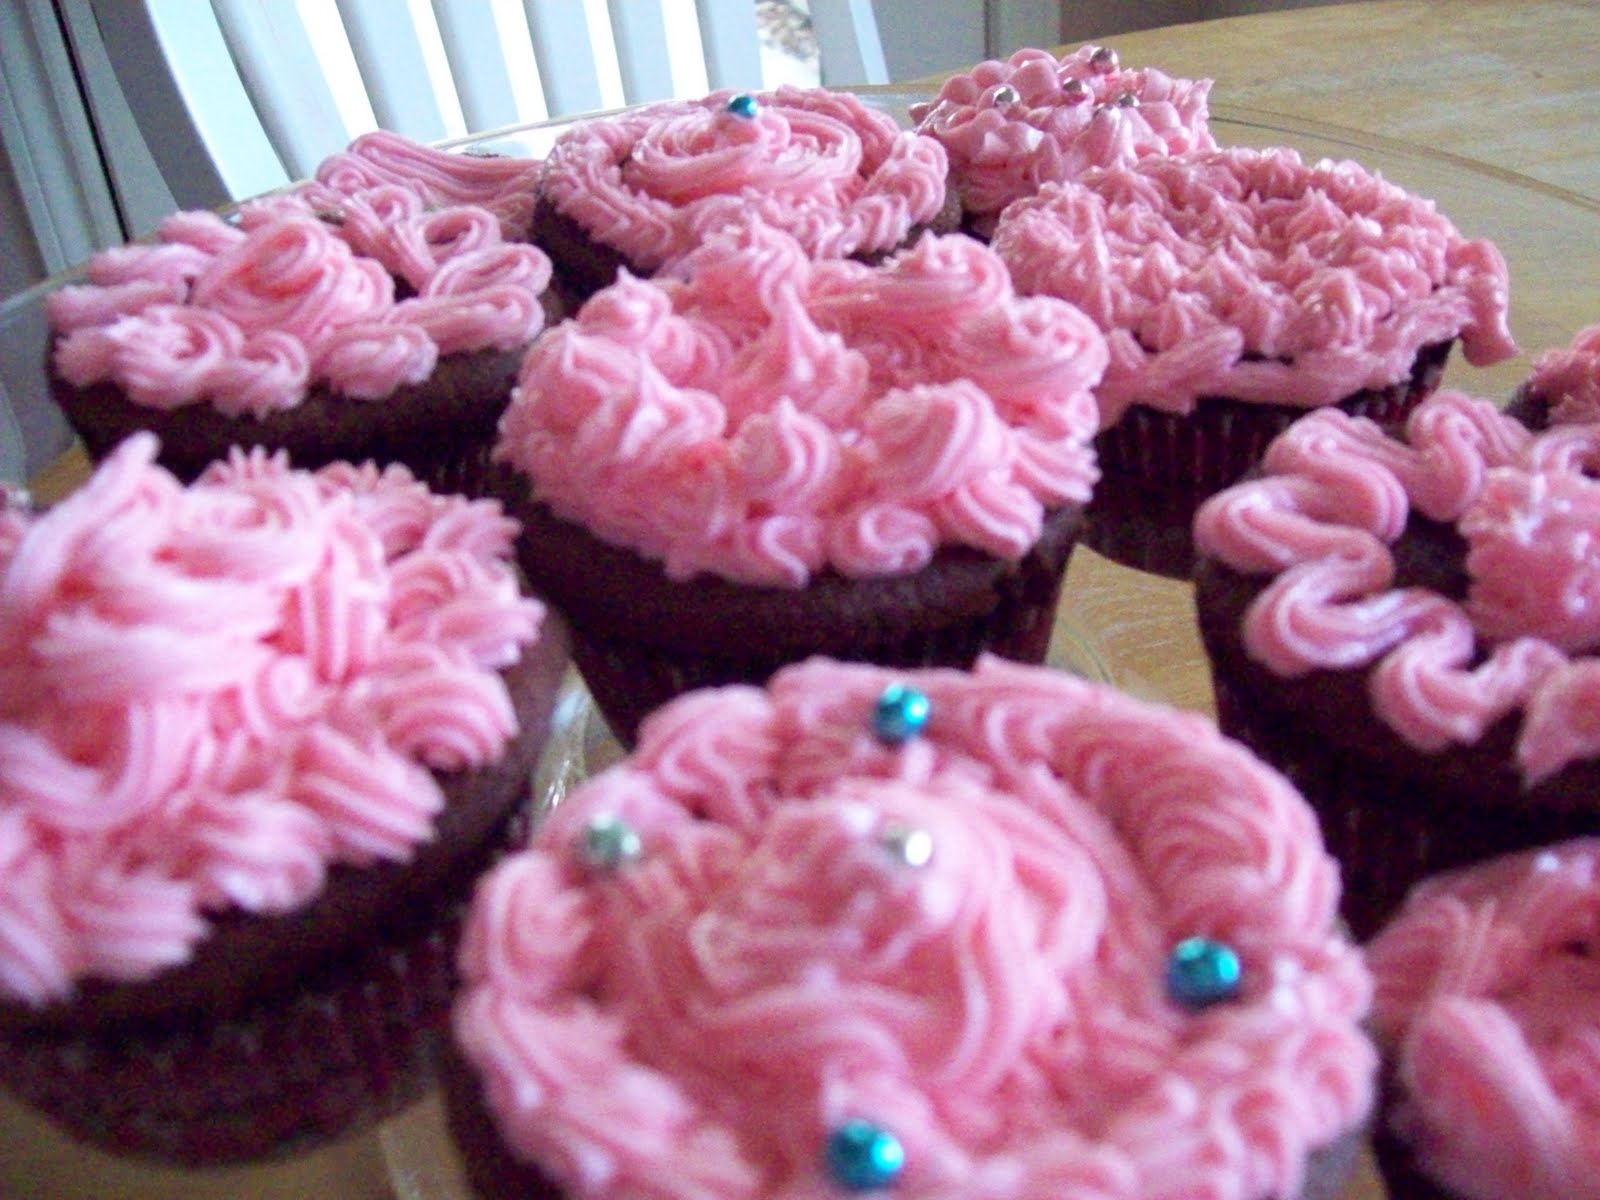
Strawberry Buttercream Frosting
Makes enough to frost 12 cupcakes
1 cup (2 sticks) unsalted butter, at room temperature
2½ cups powdered sugar
2 teaspoons strawberry extract
Pink icing gel coloring
1. Using the whisk attachment of a stand mixer, whip the butter on medium-high speed for 5 minutes, stopping once to scrape the sides of the bowl. Reduce the mixer speed to low and add the powdered sugar a little at a time, waiting until it is mostly incorporated before adding more. Once all of the powdered sugar has been added, scrape the sides of the bowl and increase the speed to medium-high and whip until fluffy, about a minute or two. Add the strawberry flavoring and continue to mix at medium-high until it is completely incorporated, scraping the sides as necessary. Add the coloring a little at a time, mixing after each addition until desired color is achieved.
Mocha Cupcakes w/Espresso Buttercream Frosting
First off I must apologize for not posting recipes earlier. I've been dealing with some health issues that have kept me away, but I'm back now with the recipe for those amazing Mocha Cupcakes I told you about. I got this recipe from the Brown Eyed Baker. She has an amazing website full of decadent desserts. Check her out when you get a chance. In the meantime, pull out your coffee maker and go to town on these bad boys. You won't regret it (although your waistline may when you're unable to eat just one). :-)
Mocha Cupcakes
(adapted from original recipe by Brown Eyed Baker)
Yield: 12 cupcakes
Prep Time: 15 minutes Baking Time: 17-20 minutes
1-1/3 cup white whole-wheat flour
1/3 cup unsweetened cocoa powder
1 teaspoon baking powder
½ teaspoon baking soda
¼ teaspoon salt
½ cup whole milk
½ cup strong brewed coffee
1½ teaspoons espresso powder
1 teaspoon vanilla extract
½ cup (1 stick) unsalted butter, at room temperature
½ cup granulated sugar
½ cup light brown sugar
1 egg, at room temperature
1. Mix the espresso powder into the brewed coffee until dissolved; set aside to cool to room temperature.
2. Preheat the oven to 350 degrees F. Line a standard-size muffin tin with paper liners.
3. Whisk together the flour, cocoa powder, baking powder, baking soda and salt.
4. Beat the butter and both sugars together on medium-high speed until light and fluffy, about 2-3 minutes. Add the egg and beat until combined. In a measuring cup, combine the milk, brewed coffee mixture and vanilla. Slowly add the flour mixture, alternating with the coffee mixture, ending with the flour mixture.
5. Divide the batter evenly between the 12 liners. Baking for 17-20 minutes or until a toothpick inserted in the center of a cupcake comes out clean. Cool completely before frosting cupcakes.
Espresso Buttercream Frosting
Makes enough to frost 12 cupcakes
1 cup (2 sticks) unsalted butter, at room temperature
2½ cups powdered sugar
1½ teaspoons vanilla extract
1½ teaspoons espresso powder
1. Mix the espresso powder into the vanilla until dissolved; set aside.
2. Using the whisk attachment of a stand mixer, whip the butter on medium-high speed for 5 minutes, stopping once to scrape the sides of the bowl. Reduce the mixer speed to low and add the powdered sugar a little at a time, waiting until it is mostly incorporated before adding more. Once all of the powdered sugar has been added, scrape the sides of the bowl and increase the speed to medium-high and whip until fluffy, about a minute or two. Add the espresso and vanilla mixture and continue to mix at medium-high until it is completely incorporated, scraping the sides as necessary. Frost cupcakes as desired.
Mocha Cupcakes
(adapted from original recipe by Brown Eyed Baker)
Yield: 12 cupcakes
Prep Time: 15 minutes Baking Time: 17-20 minutes
1-1/3 cup white whole-wheat flour
1/3 cup unsweetened cocoa powder
1 teaspoon baking powder
½ teaspoon baking soda
¼ teaspoon salt
½ cup whole milk
½ cup strong brewed coffee
1½ teaspoons espresso powder
1 teaspoon vanilla extract
½ cup (1 stick) unsalted butter, at room temperature
½ cup granulated sugar
½ cup light brown sugar
1 egg, at room temperature
1. Mix the espresso powder into the brewed coffee until dissolved; set aside to cool to room temperature.
2. Preheat the oven to 350 degrees F. Line a standard-size muffin tin with paper liners.
3. Whisk together the flour, cocoa powder, baking powder, baking soda and salt.
4. Beat the butter and both sugars together on medium-high speed until light and fluffy, about 2-3 minutes. Add the egg and beat until combined. In a measuring cup, combine the milk, brewed coffee mixture and vanilla. Slowly add the flour mixture, alternating with the coffee mixture, ending with the flour mixture.
5. Divide the batter evenly between the 12 liners. Baking for 17-20 minutes or until a toothpick inserted in the center of a cupcake comes out clean. Cool completely before frosting cupcakes.
Espresso Buttercream Frosting
Makes enough to frost 12 cupcakes
1 cup (2 sticks) unsalted butter, at room temperature
2½ cups powdered sugar
1½ teaspoons vanilla extract
1½ teaspoons espresso powder
1. Mix the espresso powder into the vanilla until dissolved; set aside.
2. Using the whisk attachment of a stand mixer, whip the butter on medium-high speed for 5 minutes, stopping once to scrape the sides of the bowl. Reduce the mixer speed to low and add the powdered sugar a little at a time, waiting until it is mostly incorporated before adding more. Once all of the powdered sugar has been added, scrape the sides of the bowl and increase the speed to medium-high and whip until fluffy, about a minute or two. Add the espresso and vanilla mixture and continue to mix at medium-high until it is completely incorporated, scraping the sides as necessary. Frost cupcakes as desired.
Tuesday, March 29, 2011
Ingredient of The Week......Chocolate!
White chocolate, dark chocolate, milk chocolate.....one of the greatest culinary creations known to man. This week we get to dive into chocolate (figuratively speaking, of course).
There have been many studies linking cocoa and dark chocolate with health benefits. Cocoa and chocolate contain a large amount of antioxidants (flavinoids). The darker chocolate with the most concentrated cocoa will be the most beneficial. According to an Italian study, a small square (20 g) of dark (bittersweet) chocolate every three days is the ideal dose for cardiovascular benefits. Eating more does not provide additional benefits, except on an emotional level maybe. ;-) Bottom line - if chocolate is going to be good for you at all, it's the dark chocolate, and here's why. Cocoa beans contain polyphenols (similar to those found in wine) with antioxidant properties which are health beneficial. These compounds are called flavonoids. The antioxidant flavonoids reduce the blood's ability to clot and thus reduces the risk of stroke and heart attacks. The higher the level of cacao in your chocolate bar, the more flavonoids. Okay, enough of the scientific stuff. Now to some fun stuff.
Many modern historians have estimated that chocolate has been around for about 200 years and for 90% of it's history it was strictly a beverage and sugar had nothing to do with it. While we're at it, let's clarify a couple of things: the term "cacao" refers to the plant or its beans before processing, while the term "chocolate" refers to anything made from the beans.
Sweetened chocolate didn't appear until Europeans discovered the Americas and sampled the native cuisine. Legend has it that the Aztec king Montezuma welcomed the Spanish explorer Hernando Cortes with a banquet that included drinking chocolate, having tragically mistaken him for a reincarnated deity instead of a conquering invader. Chocolate didn't suit the foreigners' tastebuds at first –one described it in his writings as "a bitter drink for pigs" – but once mixed with honey or cane sugar, it quickly became popular throughout Spain. By the 17th century, chocolate was a fashionable drink throughout Europe. The creation of the first modern chocolate bar is credited to Joseph Fry, who in 1847 discovered that he could make a moldable chocolate paste by adding melted cacao butter back into Dutch cocoa.
By 1868, a little company called Cadbury was marketing boxes of chocolate candies in England. Milk chocolate hit the market a few years later, pioneered by another name that may ring a bell – Nestle.
In America, chocolate was so valued during the Revolutionary War that it was included in soldiers' rations and used in lieu of wages. While most of us probably wouldn't settle for a chocolate paycheck these days, statistics show that the humble cacao bean is still a powerful economic force. Chocolate manufacturing is a more than 4-billion-dollar industry in the United States, and the average American eats at least half a pound of the stuff per month.
In the 20th century, the word "chocolate" expanded to include a range of affordable treats with more sugar and additives than actual cacao in them, often made from the hardiest but least flavorful of the bean varieties.
But more recently, there's been a "chocolate revolution," marked by an increasing interest in high-quality, handmade chocolates and sustainable, effective cacao farming and harvesting methods. Major corporations like Hershey's have expanded their artisanal chocolate lines by purchasing smaller producers known for premium chocolates, such as Scharffen Berger and Dagoba, while independent chocolatiers continue to flourish as well. (adapted from smithsonianmag.com)
Whatever the history, whatever the scientific components and data, we have had a love affair with chocolate for hundreds of years and it only seems to be getting better. Culinarily speaking, chocolate has tons of applications from steak to cheesecake. I hope to explore some of those this week and nurture our love for this amazing creation of God's.
There have been many studies linking cocoa and dark chocolate with health benefits. Cocoa and chocolate contain a large amount of antioxidants (flavinoids). The darker chocolate with the most concentrated cocoa will be the most beneficial. According to an Italian study, a small square (20 g) of dark (bittersweet) chocolate every three days is the ideal dose for cardiovascular benefits. Eating more does not provide additional benefits, except on an emotional level maybe. ;-) Bottom line - if chocolate is going to be good for you at all, it's the dark chocolate, and here's why. Cocoa beans contain polyphenols (similar to those found in wine) with antioxidant properties which are health beneficial. These compounds are called flavonoids. The antioxidant flavonoids reduce the blood's ability to clot and thus reduces the risk of stroke and heart attacks. The higher the level of cacao in your chocolate bar, the more flavonoids. Okay, enough of the scientific stuff. Now to some fun stuff.
Many modern historians have estimated that chocolate has been around for about 200 years and for 90% of it's history it was strictly a beverage and sugar had nothing to do with it. While we're at it, let's clarify a couple of things: the term "cacao" refers to the plant or its beans before processing, while the term "chocolate" refers to anything made from the beans.
Sweetened chocolate didn't appear until Europeans discovered the Americas and sampled the native cuisine. Legend has it that the Aztec king Montezuma welcomed the Spanish explorer Hernando Cortes with a banquet that included drinking chocolate, having tragically mistaken him for a reincarnated deity instead of a conquering invader. Chocolate didn't suit the foreigners' tastebuds at first –one described it in his writings as "a bitter drink for pigs" – but once mixed with honey or cane sugar, it quickly became popular throughout Spain. By the 17th century, chocolate was a fashionable drink throughout Europe. The creation of the first modern chocolate bar is credited to Joseph Fry, who in 1847 discovered that he could make a moldable chocolate paste by adding melted cacao butter back into Dutch cocoa.
By 1868, a little company called Cadbury was marketing boxes of chocolate candies in England. Milk chocolate hit the market a few years later, pioneered by another name that may ring a bell – Nestle.
In America, chocolate was so valued during the Revolutionary War that it was included in soldiers' rations and used in lieu of wages. While most of us probably wouldn't settle for a chocolate paycheck these days, statistics show that the humble cacao bean is still a powerful economic force. Chocolate manufacturing is a more than 4-billion-dollar industry in the United States, and the average American eats at least half a pound of the stuff per month.
In the 20th century, the word "chocolate" expanded to include a range of affordable treats with more sugar and additives than actual cacao in them, often made from the hardiest but least flavorful of the bean varieties.
But more recently, there's been a "chocolate revolution," marked by an increasing interest in high-quality, handmade chocolates and sustainable, effective cacao farming and harvesting methods. Major corporations like Hershey's have expanded their artisanal chocolate lines by purchasing smaller producers known for premium chocolates, such as Scharffen Berger and Dagoba, while independent chocolatiers continue to flourish as well. (adapted from smithsonianmag.com)
Whatever the history, whatever the scientific components and data, we have had a love affair with chocolate for hundreds of years and it only seems to be getting better. Culinarily speaking, chocolate has tons of applications from steak to cheesecake. I hope to explore some of those this week and nurture our love for this amazing creation of God's.
Subscribe to:
Posts (Atom)
See What I'm Pinning!
