Thursday, November 29, 2012

Cinnamon Cranberry Crusty Bread

I have given you a recipe for crusty bread before, along with ideas for variations.  This version is one I have been playing with for several weeks, experimenting with; the amount of cranberries, the level of cinnamon, trying different liquids other than water (I tried part apple juice and part water, but the apple juice seemed to make the bread sticky on the outside), just the right amount of sugar......and I think I've hit on a winner.  It has so far received the approval of my family and several of my son's high school friends who have requested I send some to school for their lunch time.  So, here for your approval........

Cinnamon Cranberry Crusty Bread


Ingredients:
3 C. All-Purpose Flour
1t. Kosher Salt
1T. Ground Cinnamon
3/4 C. Granulated Sugar
1t. Yeast
3/4 C. Dried Sweet Cranberries
1 1/2 C. Water

Directions:
In a large bowl, whisk together all the dry ingredients.  Add dried cranberries and mix with a wooden spoon.  Add water and mix with the same wooden spoon until the water is well incorporated and you have a "shaggy mess".  Cover the bowl with plastic wrap and allow to sit 8-12 hours or overnight.

When you're ready to bake, preheat the oven to 450 F.  Place a dutch oven with the lid on into the oven and warm it for 30 minutes.  In the meantime, place your bread dough on a HEAVILY floured board.  Knead a few times and shape it into a ball.  Cover the dough with plastic wrap and allow to rest while your pot warms.  Once your dutch oven is pre-heated, remove it from the oven and place your dough ball inside it.  Replace the lid and bake for 25-30 mins.  Remove the lid and bake for another 5-10 mins. depending on how browned you want your crust to be.  Remove from the oven, let cool, and enjoy!
There's nothing like fresh bread slathered in real butter!


Friday, October 26, 2012

Fruit n' Oats Breakfast Casserole

Good Friday morning all!  I am so happy this morning!  The temperature is below 60 and it's going to stay that way all day!  Perfect baking weather!  I am concerned, however, about hurricane Sandy that's supposed to plow into our eastern neighbors soon.  If you're reading this from that area, I and many others are praying for you!

I found this recipe on Urban Nester's website.  I tweaked it some, so if you don't like my version you can check hers out.  This is SO good though.  My entire family loves it.  You can bake it up and eat on it for several days.  You can eat it cold, room temperature, heated up - it's good any of those ways.  I hope you enjoy it!

Fruit n' Oat Breakfast Casserole


Prep Time: 10 mins.
Bake Time: 30-40 mins.
Serves: 6-8

Ingredients:
2C. Rolled Oats
1/3C. Brown Sugar
1 t. Baking Powder
1 t. Cinnamon
1/2 t. Kosher Salt
1/2C. Strawberries (halved)
1/2C. Blueberries (fresh or frozen)
1/2C. Semi-Sweet Chocolate Chips
2C. Vanilla Almond Milk
1 Egg
3T. Butter (melted)
1t. Vanilla

Directions:
Preheat oven to 375 F..  Generously spray the inside of a casserole dish with cooking spray and place on a cookie sheet.  
In a large bowl, mix together the oats, sugar, baking powder, cinnamon, salt, half the strawberries, half the blueberries, and half the chocolate.
In another large bowl, whisk together the milk, egg, butter and vanilla.
Add the oat mixture to the prepared casserole dish.  Arrange the remaining strawberries, blueberries, and chocolate on top.
Pour the milk mixture over everything.  Gently shake the baking dish to evenly distribute the milk in the oats.  If you like, sprinkle a little extra brown sugar over the top for a sweet, crusty top.
Bake 35-40 minutes or until the top is nicely browned and the milk mixture has set. 
Store any leftovers in the refrigerator.


 Enjoy!  :-)

Tuesday, September 25, 2012

Cheesy Potato Bacon Chowder

It's just about that time of year again!  Time to roll out the dutch oven and set some soups and stews to simmerin' on the stove.  I decided to rehearse a little this evenin' and tossed this little ditty together.  One thing I love about making soup is that it gives me opportunity to clean out the veggie drawer.  Don't worry, I don't use anything that's past it's time.  I DO use whatever I have on hand that sounds good.  For example, I used baby carrots in this recipe rather than regular sized carrots because that's what I had.  I also actually prefer the size of baby carrot slices.  Anyway, I better get this written down before I forget what I did.  Here you go!  :-)

CHEESY POTATO BACON CHOWDER

Ingredients:
1/2# Applewood Smoked Bacon, chopped
1/2 of a large Onion, diced
3 stalks of Celery, diced
15-20 Baby Carrots, sliced (or 2 regular sized carrots)
1/4 C. Whole Wheat Flour
1T. Garlic Powder
1t. Smoky Paprika
Salt and Pepper to taste
3C. Lo-Sodium Chicken Broth
2C. 2% Milk
1/2C. Fat-free Half n' Half
2 Russet Potatoes, diced
1 10oz. bag Frozen Corn, divided
1C. Colby Jack Cheese, shredded

Directions:
In a large dutch oven, cook bacon until almost crisp.  Turn off the stove and remove bacon from pot with a slotted spoon to a paper-towel lined plate or bowl to drain.  Add onion, celery, and carrots to the bacon drippings in the dutch oven.  Saute' until soft.  Add flour, garlic powder, paprika, and salt and pepper to vegetables and cook a minute or two.  Carefully stir in chicken broth, milk, and half n' half.  Stir in potatoes and half of the frozen corn.  Bring to a boil and simmer covered for about 20 mins., until the potatoes are soft.  With an immersion blender, puree the soup to desired consistency.  Adjust seasonings.  Stir in cooked bacon and remaining corn.  Add cheese 1/2 cup at a time and stir until melted.  Serve.  Garnish with more cheese, chives, or bacon if desired.  A dollop of Greek yogurt is also good.


Comfort Food!


Thursday, June 28, 2012

Crusty Bread

Hey!  It's been awhile!  I apologize for being gone so long.  Having three kids home all day keeps me a little preoccupied.  I just had to etch out some time to share this recipe with you though.  It's really trippy how it works.  I found the original recipe on simplysogood.blogspot.com  One of the fun things about this recipe is that you can easily add just about any ingredients that tickle your fancy.  This particular loaf has thyme and lemon in it, and I used all wheat flour.  I prefer some substance to my bread.

I'll go ahead and share the original basic recipe and the recipe I used today.  I hope you have some fun with this and really enjoy it.

Crusty Bread

Basic Recipe:
INGREDIENTS:
3C. All Purpose Flour
1 3/4t. Salt (I use Kosher)
1/2t. Yeast
1 1/2C. Water

DIRECTIONS:
Follow directions below, but bake for 30 minutes before removing lid.

Lemon Thyme Wheat Recipe:
INGREDIENTS:
2 3/4C. Whole Wheat Flour
1/2t. Kosher Salt
1/2t. Yeast
6 sprigs of Fresh Thyme leaves
Zest and juice of 1 small lemon
Water

DIRECTIONS:
In a large mixing bowl, whisk flour, salt, yeast, thyme leaves, and lemon zest.  Add enough water to the lemon juice to make 2 cups of liquid and add to the dry ingredients.  Mix until a shaggy mixture forms.  Cover bowl w/plastic wrap and set aside for 12-18 hours.

Heat oven to 450 degrees fahrenheit.  Once oven is up to temperature, place a cast iron pot with a lid in the oven and preheat for 30 minutes.  Meanwhile, pour dough onto a HEAVILY floured surface and shape into a ball (the dough will be VERY gooey).  Cover with plastic wrap and let sit while pot is heating.  Remove pot from the oven and drop in the dough.  Cover and bake 25 minutes.  Remove the lid and bake another 15 minutes.


This is what you end up with and it bares an amazing resemblance to sourdough bread.  Our resident bread connoisseur gave it a big thumbs up!


It's crusty on the outside, soft and chewy
on the inside.


SOME FLAVOR VARIATIONS TO TRY:

Orange Cranberry - zest and juice of 1 orange, 3/4 cups dried cranberries.

Lemon Thyme Gruyere - 2 1/2 cups grated Gruyere cheese, zest & juice of 1 lemon, chopped thyme.


Sunday, May 6, 2012

Egg Bowls

This is what we had for brunch today.  I got the idea from Tasty Kitchen.  They were very easy to make, and a lot of fun too.  You could put anything you want in them.  We chose to add bacon, Colby/jack cheese, tomato, and basil. They were delicious and everyone loved them.  I'd love to hear what you think.

Bacon Cheddar Egg Bowls


Ingredients:

Dinner rolls (or any leftover rolls you have around)
Butter, melted
Shredded Colby/jack cheese
Bacon, cooked and chopped
1 Egg for each "bowl" you make
1 slice Roma Tomato for each "bowl"
Salt to taste
Pepper to taste
Fresh Basil to taste, chopped

Directions:
  1. Preheat oven to 350.
  2. Cut the tops off of the rolls and scoop out the bread.
  3. Brush the inside of each roll with melted butter.
  4. Fill each roll with cheese, tomato, then bacon - leaving room at the top for the egg.
  5. Crack an egg into each bowl and season with salt, pepper, and basil.
  6. Bake for 12 minutes.  Cover loosely with foil and bake another 20 - 25 minutes.
Enjoy!


Cheesy, Eggy goodness!!


Thursday, April 5, 2012

Healthified Rice Pudding

Ever since I was a kid enjoying my mom's homemade rice pudding, I have loved the stuff. For some unknown reason, however, I rarely make it. Lately though, I seem to be going through a rice phase and I've rediscovered my love for rice pudding. I've also discovered that it's not the healthiest dish on the planet, but then what dessert is? Well, I made a few changes to a traditional recipe and came up with what I hope is a slightly healthier version. I have a few ideas to take it a little further into "healthy land". I'll let you know if any of those turn out yummy. For now, I hope you enjoy this version.

Healthified Rice Pudding
Copyright 2012 Brendilly Bakes, All Rights Reserved

I had a picture of it in the dish I stored it in, but somehow it got deleted.
Sorry.
:-)


Ingredients:
1-1/2 cups cooked Brown Rice
2 cups Almond/Coconut Milk blend (Almond Breeze makes this and you should be able to find it in your grocery store)
1/4 cup Turbinado Sugar
1/4 t. Sea Salt
1 Egg
1 cup Dried Cranberries
1 T. Unsalted Butter
1 t. Vanilla Extract

Directions:
1. In a medium saucepan, combine rice, 1-1/2 cups milk, sugar and salt. Cook over medium heat until thick and creamy, 15-20 minutes.
2. In a small bowl or glass measuring cup, combine 1/2 cup milk and the egg until egg is beaten.
3. Add milk mixture and dried cranberries to rice and cook 2 minutes more, stirring constantly.
4. Remove from heat and stir in butter and vanilla.

Serve warm or cold with a sprinkle of cinnamon.

NOTE: Personally, I found the flavors blended better after the pudding sat in the refrigerator overnight.

Tuesday, April 3, 2012

Nutella Caramel Swirl Cheesecake Bars

This recipe came from a fellow blogger at The Kitchen Prep. I saw "Nutella" in the name and had to try it. I am glad I did. I only made a couple of minor changes; adding more vanilla and using half heavy cream in the caramel sauce. Making the caramel sauce from scratch was the most difficult part of this recipe, but even then it wasn't THAT difficult and they are well worth the effort. And, you have enough sauce leftover for a couple of sundaes or another batch of bars. I actually gave the majority of this batch away, much to my family's disappointment. I think it'll make a great gift. I left a few bars on the cake plate for the fam'. I don't want them getting fat, after all. ;-)

Nutella Caramel Swirl Cheesecake Bars
recipe adapted from The Kitchen Prep


Nutella Caramel Sauce


1/4 cup Half & Half
1/4 cup Heavy Cream
1/4 cup Sugar
1/4 cup Water
3/4 cup Nutella
1 T. Light Corn Syrup
1 t. Vanilla Extract
Pinch Sea Salt

Warm half & half and cream in a microwaveable cup (about 30 seconds to 1 minute) until steaming.
Combine the sugar and water in a small saucepan over high heat and bring to a boil without stirring, until amber brown - keeping an eye on it as it can burn very quickly.
Carefully whisk in warm cream until smooth and let cook for 1 minute. Caramel will bubble and rise, so use a big enough saucepan so it does not overflow.
Remove from the heat and whisk in the Nutella, corn syrup, salt, and vanilla until smooth. Allow to cool until thickened, then transfer to a jar or container for storage in the refrigerator.

Crust:
2 cups All-Purpose Flour
1/2 cup firmly packed Brown Sugar
1 1/2 sticks, Butter, cut into small pieces

Preheat oven to 350 degrees. Line a 13x9x2 inch baking pan with foil and set aside.

In a medium bowl; combine flour, sugar, and butter with a pastry blender until the mixture is crumbly. It will hold its shape when a clump is pinched. Press mixture evenly into foil lined baking pan. Bake for 15 minutes until crust is slightly golden. Set aside.

Cheesecake:
1 8oz. block Creme Cheese
1/3 cup Sugar
1 Egg
1 t. Vanilla
1/4 cup Greek Yogurt

In the bowl of a stand mixer fitted with the paddle attachment, combine cream cheese and sugar until fluffy and incorporated. Add egg, and beat until combined. Add vanilla and Greek yogurt and mix until smooth. Pour into crust.
Spoon globs of Nutella Caramel sauce onto cheesecake batter, dotting throughout the mixture. With a skewer, toothpick, or tip of a knife, carefully swirl caramel throughout cheesecake to create marbleized effect.
Bake at 350 for 30 minutes, until filling is mostly set. If caramel is cooking too rapidly or becoming too bubbly, cover lightly with a sheet of foil for the last 10 minutes.
Cool to room temperature, then refrigerate and let cool completely before cutting into bars.

Fresh out of the oven. Doesn't that swirl look gorgeous?


Cooled, cut, and looking good!

Monday, April 2, 2012

Monday Monday!

Monday is a big work day around my house. I do the majority of the laundry and food prep for the week ahead. Today, we froze strawberries for smoothies and any other thing we want to have strawberries in; made panini ahead of time and tucked in the frig for tonight plus a few extra in the freezer for later; frosted the last of the banana "cakeins" I made last week; made a big batch of brown rice to have on hand for porridge or pudding; and threw together some homemade condiments (mayostard and homemade caramel sauce).

I make a lot of my own homemade condiments like jam; dressing for sandwiches and salads; coffee creamer; caramel sauce....whatever I feel like having on hand and would rather make myself than buy complete with artificial this and those preservatives. Most of what I make is pretty simple and doesn't take a lot of time. Well worth the effort to know what's in my food. If I could be a subsistence farmer I probably would. When I was young enough to do it, it wasn't even a part of my wildest dreams. Now that I'm older and it's all the body can do to maintain a couple of raised garden beds, I could imagine milking my own cows and keeping laying hens.....and growing a really big garden with lots of fruit trees! Sigh! Oh well....back to the kitchen to make some meatloaves for the freezer. Maybe later I'll share some of my prep recipes.

Happy Monday!

Thursday, March 29, 2012

Banana Chocolate Chip Cakeins W/Peanut Butter Creme Cheese Frosting

I call these "Cakeins" because they're kind of a cross between a muffin and a cupcake. They're sweet and moist (and frosted) like a cupcake, but the base recipe is a muffin recipe. I wanted a peanut butter/banana/chocolate thing and toyed with several different ways to accomplish that. In the end, I opted for banana and chocolate in the batter and peanut butter on top. I pretty much got what I wanted. My guys actually loved them without the frosting. After they had one, I had to fight them off of the others so I could frost them. I hope you like them as much as they did.

Banana Chocolate Chip Cakeins w/Peanut Butter Creme Cheese Frosting
Copyright 2012 Brendilly Bakes, All rights reserved


Cakeins:
3 C. White Whole Wheat Flour
1t. Baking Soda
1t. Kosher Salt
1/2t. Baking Powder
1t. Ground Cinnamon
1t. Freshly Ground Nutmeg
1 1/2 C. Granulated Sugar
1/2 C. Agave Nectar
1 C. Canola Oil
3 Eggs
2t. Vanilla Extract
4 ripe Bananas, coarsely mashed
1 1/2 C. Milk Chocolate Chips

Frosting
8oz. Creme Cheese, softened
1/2 C. Creamy Peanut Butter
1t. Vanilla
1 1/2 C. Powdered Sugar

Directions:
  1. Line 24 muffin cups with paper liners. Preheat oven to 325 degrees.
  2. Mash bananas and set aside.
  3. Whisk the flour, baking soda, salt, baking powder, cinnamon, and nutmeg in medium bowl.
  4. In a large bowl, combine sugar, agave, oil, eggs, and vanilla until well combined.
  5. Add all but 1T. of the dry ingredients and mix well.
  6. Toss chocolate chips with remaining flour and add to batter along with the mashed bananas, and mix gently until everything is just incorporated.
  7. Fill muffin cups with an ice cream scoop to get even amounts.
  8. Bake for 25-30 minutes, until tester inserted in the middle of a cupcake comes out clean.
  9. Set on wire rack to cool in the pans.


This is what they look like when they first come out. Notice how you can see chunks of banana. That's what you want.


When you are ready to frost:

Place softened creme cheese and peanut butter in the bowl of a stand mixer and using the paddle attachment, mix on medium speed until well combined. Add vanilla and combine. With the mixer running on low speed, add powdered sugar a 1/4 cup at a time, combining well and scraping down the sides of the bowl as needed. Mix until all the sugar is used. Check for taste and adjust if necessary.


This is what they look like when they're being enjoyed. Yummalicious!!


Monday, March 12, 2012

Brown Rice Porridge

I found the coolest website this weekend. It's called Eating Bird Food and it's written by a Holistic Health Coach named Brittany. She has some really great healthy recipes, one of which I'm sharing with you today. I plan to try several more and will share those as well.

I'll be honest with you, I used to be a total health food nut. Since discovering Sonic here in Texas, however, that has changed....oh! and Chick-Fil-A....can't forget them. I still use a lot of ingredients you'd find at the health food store, and I eat just healthy enough for some of my southern family members to roll their eyes at me and ask, "What the heck is that?!" I'm really feeling a pull to get things back to how they once were though. Yoga, tofu, no fried foods.....I miss that lifestyle. It made me feel good. So, you can maybe imagine my excitement when I found Miss Brittany because I've almost completely morphed into a southerner and can barely remember how to prepare tofu. Okay, now that I've offended southerners and let my dark skeleton out of the closet, I hope you'll still read my blog and know that although I was born in California, I was raised by a Texan and an Arkansasian (don't think that's really a word) and I LOVE southern cooking, no doubt, but it hates me and my waistline (which I would desperately like to find again). So, this morning, guess what?! I did Yoga stretches and tried the Brown Rice Porridge recipe on the Eating Bird Food site. I feel like I have a new lease on life! Not sure how the rest of the day will go, but it got a good start. :-)

Normally, I would add some kind of sweetener to my morning hot cereal, but this one didn't really need it. If you prefer your porridge syrupy sweet, then you might want to add some.


I think the banana adds a lot of sweetness, and it's so smooth and creamy that I hardly noticed the lack of sugary-ness. The texture that the brown rice adds is really wonderful, as well. Give it a try. I'd love to know what you think.

Brown Rice Porridge
Makes 2 Servings

1 cup cooked Brown Rice
1 cup Water
2T. Rolled Oats (uncooked)
1 whole Banana
Cinnamon (as much or as little as you like)

Heat all the ingredients on high until it comes to a boil. Reduce heat to a simmer, cover, and cook for 8-9 minutes.


Easy as can be! I added some peanut butter and a sprinkling of freshly grated cinnamon to mine, and it was so yummy and satisfying. I loved it! If you want it sweeter, add some Agave nectar or pure Maple Syrup and it will still be healthy. Enjoy!

NOTE: My brown rice was actually mixed with a little Quinoa: 4 cups water, 1 1/2 cups brown rice, 1/2 cup Quinoa

Wednesday, March 7, 2012

Peanut-Butter Frosted Energy Bars

I love the creative process, especially in the kitchen. This recipe was a perfect example of "creating as you go", because that's exactly what I did. I made these energy bars by combining ingredients that I thought would go well together to create a healthy cookie-type snack. The finished product, however, was not really to my liking. They were big, ugly, and a little bland. In other words, they really tasted healthy. I wanted healthy that tasted unhealthy - maybe that's too much to ask? Well, with a little help from my resident taste-testers (a.k.a. kids) we finally yielded an end product that satisfies both the healthy tooth (if there really is such a thing) and the sweet tooth. I hope you like.

Peanut-Butter Frosted Energy Bars
Copyright 2012 Brendilly Bakes, all rights reserved


Energy Bar Ingredients:
Cooking spray
1 cup Quick-Cooking Oats
1 cup Wheat Germ
1/4 cup White Whole Wheat Flour
1 1/2 cups stemmed, Dried Figs
1t. Ground Cinnamon
1/3 cup Agave Maple Syrup
2 large Eggs

Directions
1. Preheat the oven to 350. Coat a 9x13" baking pan with cooking spray
2. Place the oats, wheat germ, flour, figs, and cinnamon in a food processor; coarsely chop
3. Add the Agave maple syrup and eggs; pulse until well combined.
4. Transfer the mixture to the pan; spread evenly with greased fingers.
5. Bake about 20 mins.. Cool in the pan for 15 minutes, then cut into 16 bars. Cut those bars in half and frost.

Peanut Butter Frosting
1 cup smooth Peanut Butter
1/2 cup Honey

In a small bowl, combine peanut butter and honey and mix well.


These healthy treats are dense, chewy, and perfectly satisfying with a nice cold glass of milk. :-)


NOTE: Agave maple syrup can be found in the grocery store with the other pancake syrups, or any health food store.

Monday, March 5, 2012

Piggy Biscuits w/Caramelized Onion

This recipe is an interesting story. I set out to make one thing and ended up with something totally different. I was originally going to make these bacon wrapped smokies that I found on Pinterest, but the more I thought about it the guiltier I felt. The recipe consisted of four ingredients: bacon; smokies; brown sugar; and butter. While that sounds really good and the picture of them looked even better, I just couldn't, in good conscience, feed anyone that much fat in one concentrated little meat by-product. I just didn't feel good about it (I was taking these to church). I had already bought the ingredients though, so I had a big 2# bag of smokies that I needed to do something with. My husband suggested I make the traditional pigs-in-a-blanket with the refrigerated crescent rolls, but I didn't have any crescent rolls and was too lazy to go to the store. So, I expended my energy thinking (one of my favorite ways to burn calories.....it does burn calories, right?) and came up with these.

Piggy Biscuits w/Caramelized Onion
Copyright 2012 Brendilly Bakes, All rights reserved

Makes 24 biscuits


Ingredients
4cups All-Purpose Flour
4t. Baking Powder
2t. Kosher Salt
1t. freshly ground Black Pepper
2T. California Style Onion Powder
1T. Garlic Powder
2/3 cup Butter, cut up
1 large Onion, caramelized and cooled (recipe following)
2 cups Buttermilk
1/2 T. Butter
24 Little Smokies
Shredded Colby Jack Cheese

I don't think my method for caramelizing onions is what you could call "traditional", but they come out tasting really good. I hope you like it.

To Caramelize Onions
Place 2T. butter and 2T. olive oil in a skillet. Cut onion in quarters then slice thinly and add to cold skillet with butter and olive oil. Season with salt and pepper to taste, and a pinch of red pepper flake. Over medium-low heat, cook until soft and golden, about 20 minutes. Add 1-2T. Worcestershire sauce and continue cooking until the Worcestershire has evaporated and the onions are caramelized, about another 10 minutes.

Biscuit Directions
1. Preheat oven to 325. Cover a cookie sheet with foil.
2. In a large bowl, combine dry ingredients and whisk well.
3. Cut the 2/3 cup of butter into the dry ingredients with a pastry blender or two knives.
4. Add cooled onions to the dry ingredients and cut in with a pastry blender until mostly combined. Finish stirring in and combining with a fork.
5. Add Buttermilk to dry ingredients and mix with a fork.
6. Melt the 1/2 T. butter on foil-lined cookie sheet in the warm oven.
7. Once the butter is melted, remove cookie sheet from the oven and spread the butter all around the cookie sheet with a pastry brush or paper towel. Drop biscuit batter by large spoonfuls (I used an ice cream scoop) onto cookie sheet.
8. Place one smokie on top of each biscuit, pushing it into the biscuit.
9. Bake for 10 minutes, then top each biscuit with a sprinkling of shredded cheese and bake for 3 more minutes.


All dressed up and ready for church.


NOTE: My husband didn't really care for the bread to meat ratio in these, so I'm going to try it again and make the biscuits smaller and see how that works. I'll let you know. :-)

Oreo Cheesecake Bites

I love cheesecake about as much as anybody. I'm not so crazy about Oreos just because I'm a bit of a cookie snob and don't care for store bought cookies...except maybe for a few of the Pepperidge Farms varieties. However, it turns out that Oreos go tremendously with cheesecake. These little beauties are not my own invention and I didn't change the recipe one bit. They're perfect the way they are.

I found these on Pinterest courtesy of Mel's Kitchen Cafe. I loved that they were cheesecake, they were bite-sized, and the recipe made enough for me to take to church and share. So, I gave them a go and they WENT....fast! Everyone loved them and I think you will too!

Oreo Cheesecake Bites
Makes 36 or more bites depending on size


INGREDIENTS:
36 Oreo cookies, divided
4T. Butter
4 pkgs. (8oz. each) Cream Cheese, softened
1 cup Granulated Sugar
1 cup Sour Cream
1t. Vanilla
4 large Eggs
4oz. Semisweet Chocolate
4oz. White Chocolate

DIRECTIONS:
1. Line a 9x13" baking pan with foil, with ends extending over sides.
2. Finely crush 24 Oreo cookies.
3. Melt 1/4 cup butter; mix with crumbs and press onto bottom of prepared pan.
4. In a large bowl, beat the cream cheese and sugar with mixer until blended. Add sour cream and vanilla; mix well. Add eggs, one at a time, beating after each just until blended.
5. Chop remaining cookies and gently stir into batter; pour over crust.
6. Bake the cheesecake for about 35-40 minutes or until the sides are set and the center is almost set. Cool completely on a wire rack in the pan.
7. When the cheesecake is completely cooled, cover with plastic wrap and refrigerate for at least 2 hours.
8. When chilled, remove the cheesecake using the foil overhang and cut the cheesecake into bite-sized pieces. Place the cheesecake bites on a wax or parchment paper-lined baking tray.
9. Melt the semisweet chocolate and white chocolate in separate bowls (I used the microwave, stirring after 30 second intervals until melted).
10. Pour the melted chocolate into a ziploc bag, one for the semisweet, one for the white. Snip a small corner off the corner of the bag and drizzle the chocolate over the cheesecake bites.
11. Chill the bites until ready to serve. Alternately, the drizzled bites can be frozen in an airtight container for up to a month. Let them defrost in the refrigerator and serve chilled.

NOTES:
* I used Ghirardelli 4oz. chocolate bars in this recipe. They melt beautifully and it's some of the best chocolate around.
* Snip a SMALL hole in the frosting bag, better to cut too small a hole and have to do more than vice versa. Gravity is very helpful and you could end up with chocolate everywhere if you're not careful. Holding the tip of the bag up until you're ready to drizzle is helpful also
* Keep a paper towel handy to wipe your knife as you're cutting these. Too much cheesecake on your knife causes each subsequent cut to be messier and tears up the bites.
* I used a food processor to crush the first 24 Oreos, but you could also put them in a ziploc bag and pound them with your rolling pin.

Thursday, March 1, 2012

Still Healing


Hi!

I just wanted to update you and let you know that things have been a little slow around here due to the fact that my hands are still healing. In fact, the one that just got the cast taken off of it has been giving me some trouble the past few days so my cooking has been minimal, i.e. quick and easy. I haven't had a lot of culinary masterpieces to share, I'm sorry to say. Today is a little better, but I still need to pace myself. I'm doing some cooking for my church this weekend and trying to save up my energy for that. If it turns out good, I'll share those recipes with you.

Thank you for your patience as I continue to recover from surgery and give my hands time to heal. I'll make it up to you with some fantastic new recipes in the near future. ;-)

Love and Blessings!
Brenda :-)

Thursday, February 23, 2012

Oatie P.B. Breakfast Smoothie


We love smoothies in our house. We especially love making up our own with crazy ingredients. This one isn't really crazy, except maybe for the oats, but still it's not really crazy. It IS crazy good though. The great thing about smoothies is you can switch up the ingredients and the amounts so easily. Mix it up, taste it, if you don't like it add something else to alter it and try again. Smoothies are just fun - to make and to drink. I hope you enjoy this one.


Oatie P.B. Breakfast Smoothie
Copyright 2012 Brendilly Bakes, All rights reserved

Ingredients
1/2 cup Quick Cooking Oats
1 t. Ground Cinnamon
2 ripe Bananas
1/2 cup Creamy Peanut Butter w/Honey
2 T. Agave Nectar
1 cup Vanilla Yogurt
12 Ice Cubes

Directions
1. Place cinnamon and oats in a blender and blend until you have oat flour.
2. Add remaining ingredients and blend on high until everything is well combined. If it's too thick for you, add 1/4 cup Vanilla Rice Milk or whatever kind of milk you like.


Serve with a sprinkling of cinnamon if you like. I LOVE cinnamon so that's something I would definitely do.


Wednesday, February 22, 2012

Crockpot Chicken Stroganoff


This recipe turned out very interesting. At first taste I thought it a bit bland, but each bite left me eager for the next. The flavor seems to accumulate as you eat this dish. I used chicken thighs because my family loves them and every once in awhile I like to give them a break from my usual, healthier, chicken breasts. I think you could use either in this recipe with success. One trick I've learned is that frozen chicken works great in the crockpot as long as it's boneless.

I love cooking with wine. If you prefer, however, you could substitute chicken broth or even water in it's place here. You might want to kick up the seasonings if you use water though. Either way, I hope you enjoy...

Crockpot Chicken Stroganoff
Copyright 2012 Brendilly Bakes, All rights reserved

Ingredients
2 cans Cream of Mushroom Soup
1/3 cup Pinot Grigio
1 cup sliced Fresh Mushrooms
2 # frozen boneless, skinless Chicken Thighs
3/4t. Salt (plus more for chicken)
3/4t. Freshly Ground Black Pepper (plus more for chicken)
1T. Dried Minced Onion
1 1/2t. Garlic Powder
8oz. Sour Cream
12oz. Dry Whole Wheat Egg Noodles


Directions
1. In medium bowl combine; soup, wine, 3/4t. salt, 3/4t. pepper, minced onion, and garlic powder until well combined.
2. Lay chicken in the bottom of your crockpot and season with salt and pepper to taste. Add mushrooms to the crockpot and cover with soup mixture.
3. Cover and cook on low 6 hours.
4. When you're ready to serve, cook the egg noodles in boiling, salted water for 7 minutes or until tender. Add sour cream to crockpot and stir to incorporate, breaking up the chicken at the same time. Serve chicken over the egg noodles with a sprinkling of nutmeg for an extra flavor punch.

Monday, February 20, 2012

Tomorrow's The Big Day!

I am so excited! Tomorrow I get the cast taken off of my left arm. I only wish it were happening as early as the surgery did. Alas, I have to wait until 3:30 in the afternoon. I'm still excited though! If you've ever had to wear a cast for any length of time you can relate.

Heavy, confining, hot, and itchy are the first adjectives that come to mind. I've tried really hard for my sweet hubby's sake to not complain too much, but I don't think I did that great of a job. My constant heavy sighing probably drove him more nuts than any words I may have spoken regarding my discomfort. The past few days in particular, the cast has been slipping down my arm in a losing battle against gravity, irritating my stitches. So, when I tire of wearing my sling or it's in my way, I walk around with my wrapped arm in the air as if constantly waiting to be called on by the teacher, in an attempt to help it win the gravity battle. Or, I spend as much time as possible just sitting with my arm propped on pillows. All of these activities just take turns annoying me, thus the heavy sighs. Soon it will all be over though, thank God Almighty! I am chomping at the bit to be able to do my hair again; to take a shower without a garbage bag on my arm & rubber bands cutting off my circulation (holding the garbage bag on); to be able to braid my little girl's hair again instead of having her look like a little street urchin who has never seen a hairbrush; to do so many little day-to-day tasks that most of us take for granted. It's amazing how many things cannot be done with just one hand. I think the thing I'm most excited about is getting back into my kitchen and being able to cook for my family again.

My husband, Rich, has been amazing through all of this. He has come home for lunch every day and made lunch for me and our five-year old. After work, he has cooked supper, with minimal help from me, for our family of five. He has cleaned, done laundry, and picked up my slack in almost every area. All the while, being his usual cheerful and supportive self, and taking care of me. One of the ways I have always shown my love for him is by cooking for him. I particularly like for him to come in at the end of a long day at work to the smell of something good cooking. It's the way to a man's heart.....one of the ways anyway. It certainly works for me and MY man. I've missed being able to do that for him. Food is also a big way that I show love. It's a form of self-expression for me and I need to get back to expressing myself. It will also be really nice to be able to type two-handed again, and communicate with you more regularly. I am so excited! I can't wait for tomorrow! I think I'll get to bed so it will come quicker. Sweet dreams! :-)

Tuesday, February 14, 2012

Short Hiatus

Good morning!

Today is Valentine's Day and day 5 of my cast enwrapped recovery from Carpal and CubitalTunnel surgery. I am feeling well out of the drug induced fog that accompanies pain meds and wanted to update you as to why no new recipes were invading your inbox.

While I am capable of typing one-handed (albeit painfully slowly), two hands are mandatory in the kitchen - my kitchen at least. I tried cutting a lemon in half one-handed for my water this morning. It was almost comical. I ended up hoisting my cast up to the counter and using it to weigh down the lemon (the cast is rather heavy). It worked - awkwardly - but, it worked and I got lemon in my water! Yay! If simply making lemon water was that cumbersome, I can't imagine trying to whip up a new casserole recipe or something. I guess I could use my hubby's hands and just tell him what to do. Oh wait, I did that last night with supper. It turned out okay, but the process was very frustrating. It's very difficult trying to tell someone how to do things that are so second nature to you, you don't even really think about how you do them. Can I get an amen?

No. I think I'll let my sweet hubby cook what he wants for supper and wait until I'm two-handed again before I venture back into the kitchen. It won't be long. I get my cast off in one short week. It'll fly by, I'm sure and I'll be creating tasty new concoctions in no time. Meanwhile, I may just write to keep my sanity and to keep in touch. I hope you don't mind.

Have a sweet Valentine's Day!

Blessings!
Brenda. :-)

Tuesday, February 7, 2012

Crockpot Tilapia Stoup

Crockpots are amazing things! With just a minimum amount of effort, complete meals can be prepared. Not only that, but a myriad of other things can be created in a crockpot; desserts, bread.....I wouldn't be surprised if you could even sterilize baby bottles. Don't quote me on that one though. I've never actually tried it.

I have, however, tried a fish stew/soup (stoup) with resounding success. My oldest son will not eat any other soup I make. He adamantly refuses, except for this one. This one he loves! I think that's kinda funny because I wouldn't expect such a picky eater to like fish at all. Silly me! Goes to show what I know. Try this on YOUR picky eater. I'd love to know the response. ;-)

Crockpot Tilapia Stoup
Copyright 2012 Brendilly Bakes, All rights reserved


4 Yukon Gold Potatoes, cubed
1/2 small bag Baby Carrots
1 small bag Frozen Corn
5 frozen Tilapia filets
1 can Cream of Mushroom Soup
1/2 cup Dry White Wine (I use Pinot Grigio)
1-1/2 cups Lo-Sodium Chicken Broth
2 t. Salt
1 t. Pepper
2 t. Onion Powder
2 t. Garlic Powder
2 t. Coriander

1. Place cubed potatoes in bottom of slow cooker, season with 1 t. of the salt and 1/2 t. of the pepper. Add in carrots, corn, and 1/2 cup of Chicken broth.
2. Place fish filets on top of vegetables and season with 1/2 t. of the salt, 1/4 t. of the pepper, and 1 t. each of the onion powder, garlic powder, and Coriander. (Season each layer) :-)
3. In a glass measuring cup or bowl mix; soup, wine, remaining chicken broth, and remaining seasonings. Cook on high for four hours. Stir and reduce heat to low for 30-45 mins. Serve and Enjoy!


A sprinkling of cheese never hurt either. Colby Jack is our cheese of choice for this occasion.


NOTE: Potatoes normally require a lot of seasoning. That's why I seasoned them separately in this recipe. If you feel that more is needed, by all means add more.

Wednesday, February 1, 2012

Gringo Nacho Casserole


I got creative again. I was a little late with dinner tonight and needed to do something quick and easy with stuff I had on hand. The result is this casserole that my guys absolutely loved. My hubbie said it was so awesome he could eat the whole thing by himself. I call it "gringo" because I used mild taco seasoning and that's the spiciest thing in this dish. I call it "nacho" because of the tortilla chips and cheese. There were no leftovers. :-)

Gringo Nacho Casserole
Copyright 2012 Brendilly Bakes, All rights reserved

Yield: 6-8 servings
Prep time: 15-20 mins.
Baking time: 30-35 mins.

1-1/2 lbs. Lean Ground Turkey
1-1/2 teaspoons Kosher Salt
1 teaspoon freshly ground Black Pepper
1 Tablespoon Onion Powder
1 pkg. Mild Taco Seasoning
8 oz. Cream Cheese, softened
1/2 cup Greek Yogurt
1 can Green Beans, drained
1 cup Frozen Peas
1 cup Frozen Corn
3-4 handfuls of Tortilla Chips
1 cup shredded Colby Jack Cheese

1. Preheat oven to 350 degrees F. and spray a 9x13" casserole dish with nonstick cooking spray.
2. In a large skillet over med-hi heat, brown the turkey with the salt, pepper, and onion powder.
3. Once meat is browned, turn off heat and mix in the taco seasoning, incorporating it well into the meat.
4. Add cream cheese and mix until well combined.
5. Add yogurt and vegetables, and mix until well combined.
6. Pour mixture into the casserole dish. Crush tortilla chips over the top, and top the chips with the shredded cheese.
7. Bake 30-35 mins. or until bubbly and slightly browned on top.
8. Remove from oven and serve immediately.


Sour Cream and Guacamole would be great accompaniments, as well as a tossed green salad.

Tuesday, January 31, 2012

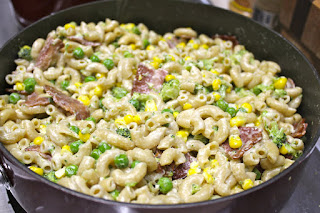
Alfredoroni

Alfredo sauce is one of my favorite things in the world. Back in the day I made it with creme cheese and it was a rather labor intensive process. For the past few years though I've used a drastically simplified method, and one that may actually be closer to the real thing. Not being Italian, though, I'm not completely sure. I just know that it's REALLY good. I probably make one version or another of this almost once a week. This one was pretty different in that I used elbow macaroni instead of penne or rotini. My youngest said I should use the elbow macaroni all the time. Let's see what YOU think.

Alfredoroni
Copyright 2012 Brendilly Bakes, All rights reserved


Yield: 6-8 Servings
Prep time: 15 minutes
Cooking time: 20 minutes

Ingredients
8 slices Turkey Bacon, cooked and coarsely chopped
1 Tablespoon Unsalted Butter
1 Tablespoon Olive Oil
3 cloves Garlic, chopped
2 cups Heavy Cream
1-1/2 cups frozen Broccoli, chopped
1 cup freshly grated Parmigiano Reggiano (plus more for sprinkling)
1 cup frozen Corn
1 cup frozen Peas
Salt, Pepper, and Nutmeg to taste
1# Whole Wheat Elbow Macaroni

Directions
1. Start a large pot of water to boiling. Once it boils, add a good handful of salt and macaroni, boil for 9-10 minutes or until pasta is al dente.
While the water is boiling:
2. In large skillet or saucepan with sides, place butter, olive oil, and garlic.
3. Turn heat to medium. Once the butter melts, stir garlic and oils, and cook the garlic for just a minute or two.
4. Add broccoli and a little salt and pepper to the pan, and sauté for another minute.
5. Add heavy cream, parmesan cheese, a little more salt and pepper, and nutmeg. Stir and bring to a simmer.
6. Add peas, corn, and bacon and taste for seasonings. Bring back to a simmer and simmer gently until pasta is done, stirring occasionally.
7. Once pasta is done, drain and add to the sauce, stirring gently until everything is well combined. Turn off heat and serve immediately - with a sprinkling of cheese if desired.


Even my picky eater makes short work of this one.

Grande Quesadilla

I felt like being a little adventurous today (adventurous for me anyway) with lunch. My oldest son asked for a quesadilla and for him that means tortilla, cheese, and refried beans if we have them - that's it. I, on the other hand, like a little more variety. We DID have some homemade refries on hand as well as; avocado, tomato, and some corn. I thought those all sounded like the makings of a great quesadilla. Here's what I did. Keep in mind I was only making one quesadilla. Just increase the amounts for more.

Grande Quesadillas
by Brendilly Bakes

Yield: 1 quesadilla
Prep time: 10 minutes
Cook time: 7-10 minutes

2 Whole Wheat Tortillas
Butter for buttering tortillas
Refried Beans (I used my own homemade - the recipe is on the blog - you could use canned if that's all you have on hand).
1/2 of a small Avocado, thinly sliced
3 slices of a Roma Tomato, diced
1/4 cup frozen Corn
Shredded Colby Jack cheese (desired amount)
Salt and Pepper to taste

1. Butter one side of one tortilla and place buttered side down on a cold griddle.
2. Spread one large spoonful of beans on the tortilla and spread slightly, then sprinkle with a good handful of cheese.
3. Make a ring of avocado slices around the edge of the tortilla, fill in the center with tomato slices, and sprinkle with kosher salt and freshly ground pepper to your taste.


4. Sprinkle corn on top of tomatoes and cover with another handful of cheese (or the amount you desire).
5. Butter one side of the other tortilla and place butter side up on top of the vegetables.
6. Turn your griddle on to 300 and cook until the first side of your quesadilla is browned to your liking. Flip carefully and cook until the other side is browned and cheese is melted.


Serve with sour cream and enjoy!


Some other really tasty fillings I'd like to try are; bacon, grilled mushrooms and/or onions, black olives.... I often use black olives and bacon in quesadillas, but all of these ingredients combined could be amazing. Hmmmm.....quesadillas for supper?? ;-)

Monday, January 30, 2012

Orange Cream Cake

The inspiration for this cake came from one of my favorite bloggers, The Brown Eyed Baker. She did this with root beer.

As you may or may not have noticed, a lot of my cooking revolves around what my husband likes because I just adore him and enjoy cooking to his taste as much as possible. Well, my sweetie LOVES orange creme anything; creamsicles, soda, candy...all of it. So, I got to thinking about making an orange creme version of this root beer cake. This was the result


Orange Cream Cake
Copyright 2011 Brendilly Bakes, All rights reserved

Yield: One 10" bundt cake
Prep Time: 30 minutes
Bake Time: 35-40 minutes

Cake Ingredients
2 cups Orange Cream soda (do not use diet soda)
1- 4 cup serving size pkg. Vanilla Pudding Mix
1/2 cup Unsalted Butter, cut into 1" pieces
1 cup Granulated Sugar
2 cups All-Purpose Flour
1- 1/4 teaspoons Baking Soda
1 teaspoon Salt
Zest of 1/2 Orange
2 Eggs

Frosting Ingredients
2 ounces White Chocolate, melted and cooled slightly
1/2 cup Unsalted Butter, softened
1 teaspoon Salt
1/4 cup Orange Cream Soda
1 - 4 cup serving size pkg. Vanilla Pudding Mix
2 cups Powdered Sugar
Zest of 1/2 Orange

Cake Directions
1. Preheat oven to 325 degrees F. Generously spray the inside of a 10-inch bundt pan with nonstick cooking spray, or butter the pan and dust with flour, shaking out the excess flour; set aside.
2. In a medium saucepan, heat the soda, pudding mix and butter over medium heat until the butter is melted. Add the sugars and whisk until dissolved. remove from the heat and let cool.
3. In a medium bowl, whisk the flour, baking soda and salt together.
4. In a small bowl, whisk the eggs until just beaten, then whisk them into the cooled pudding mixture until combined. Gently fold the flour mixture into the pudding mixture. The batter will be slightly lumpy, which is okay. Do not overbeat it, as it could cause the cake to be tough.
5. Pour the batter into the prepared pan and bake for 35-40 minutes, until a tester inserted into the middle of the cake comes out clean. Transfer the pan to a wire rack to cool completely. Gently loosen the sides of the cake from the pan and turn it out onto the rack.

Frosting Directions
1. Place all frosting ingredients into the bowl of a stand mixer and mix on medium-low until combined and satiny smooth.
2. Use a spatula to spread the frosting over the cake in a thick layer. Let the frosting set before serving. Store leftovers wrapped well or in an airtight container at room temperature.

NOTE: If you are using a dark, nonstick pan, heat the oven to 300 degrees F.

As you may have figured out, this cake is very sweet and moist. It's not something you'd want to eat on a regular basis, but for a special dinner with friends it's perfect. Which is exactly what I made this for, and I'm excited to say it was a hit. My friends don't mind being my guinea pigs, and after this one they were no less eager than before. :-)


I sprinkled some orange sugar on top just for fun.

Friday, January 27, 2012

Spicy Irish Cheesecake


I am so excited about this recipe! I have never had the guts to play with a cheesecake recipe like I did this one, and it was a success! I absolutely love cheesecake and have only made it once or twice before. Actually, I think the only time I make it is when I make it for the person this one is for. One of the guys my husband works for graciously works on our computers when we have problems, and never asks for anything in return. We happen to know, however, that he loves cheesecake. So we pay for our computer repairs with cheesecake. :-) I will be making this one again. Maybe next time for me and my family.

This recipe is not as simple as other cheesecake recipes I've encountered. At the same time, it's not as difficult as some others. Either way, it was well worth the effort.

Spicy Irish Cheesecake
Copyright 2012 Brendilly Bakes, All rights reserved

Graham Crust
2 cups Graham Cracker Crumbs
2 Tablespoons Brown Sugar
6 Tablespoons regular salted butter, melted
Spiced Cheesecake Filling
4 (8 oz.) packages of Creme Cheese, room temperature
1 1/4 cups Granulated Sugar
4 large Eggs, room temperature
1/2 cup Heavy Cream
1/4 cup Irish Cream Liqueur
1 teaspoon Homemade Pumpkin Pie Spice (Recipe follows)
1 Tablespoon Pure Vanilla Extract
Homemade Pumpkin Pie Spice
2 teaspoons Cinnamon
1/4 teaspoon Ginger
1/4 teaspoon Nutmeg
Scant 1/4 teaspoon cloves
Spicy Irish Topping
1/4 cup regular, salted butter
2 Tablespoons all-purpose flour
1/2 cup Heavy Cream
1/4 cup Irish Cream Liqueur
1/4 cup Pure Maple Syrup
1/4 cup packed Brown Sugar
1 teaspoon Cinnamon
1/2 teaspoon Nutmeg
1/2 teaspoon pure Vanilla Extract

Cake Directions


1. Preheat oven to 350 degrees F. Tightly wrap a 9 inch springform pan in heavy duty foil. This keeps the water bath you're going to use out of the cake.
2. Mix together the crust ingredients and press into the bottom of the pan and about 1 1/2 inches up the sides. Bake for 7 minutes and cool completely on a wire rack.
3. Begin to boil a large pot of water for the water bath.
4. In the bowl of a stand mixer fitted with the paddle attachment, combine the creme cheese and sugar; mix until smooth (about 2 minutes). Add eggs, one at a time, fully incorporating each egg before adding the next. Scrape down the bowl in between each egg. Combine heavy cream and Irish Cream in a glass measuring cup. Add to creme cheese mixture along with pumpkin pie spice and vanilla; combine until thoroughly incorporated and smooth in texture.
5. Pour batter into prepared crust. Place pan into a larger pan and pour boiling water into the larger pan until halfway up the side of the cheesecake pan.
6. Bake 45 to 55 minutes. The edges will appear to be set, but the center will still have some jiggle to it. Close the oven door, turn off the heat and let the cheesecake rest in the oven for at least one hour, and up to 3 hours.
7. Carefully remove the cheesecake from the water bath and place on a cooling rack to cool completely. Once the cake is completely cooled, place it into the refrigerator for at least 5 hours.

Sauce Directions


1. Mix together the brown sugar, cinnamon, and nutmeg in a small bowl.
2. Combine the heavy cream, Irish Cream, and maple syrup in a one cup glass measuring cup with a whisk, until combined.
3. Melt butter over medium heat, whisk in flour and whisk for about one minute.
4. Turn off the heat. Whisk cream mixture with your warm whisk to temper it a bit, then slowly whisk into butter and flour, a little at a time - whisking as you pour.
5. Whisk in the sugar and spice mixture.
6. Turn the heat back on to medium. Cook, stirring constantly, until sauce has thickened. Remove from heat and stir in vanilla extract.
7. Allow topping to cool completely before topping the cheesecake.

Assembly: Remove cheesecake from refrigerator and remove foil from around the pan. Release the springform and set the pan bottom with the cheesecake on it on a plate or cake stand (or if you're really brave you can attempt to remove the cake from the bottom of the pan). Spoon sauce on top of the cheesecake in whatever fashion makes you happy. Refrigerate for at least one hour before serving. Serve with whipped cream and more sauce on the side. Enjoy!


I had enough filling leftover to make a few mini-cheesecakes to keep for us. Yay!

See What I'm Pinning!

Follow Me on Pinterest